Easy How to Draw a Tigers Habitat Tiger Habitt
This easy Tiger Drawing tutorial will teach you how to draw a tiger step by step until you can draw your tiger with confidence. Everyone loves to draw a tiger. Maybe it is their powerful appearance or childhood memories Shere Khan, The Tiger King from Jungle Book.
Don't Be Intimidated
Tutorials can be difficult to follow, but I have tried to make this one as simple as possible. Easy to follow instructions will take you through each step of the process. You might also find this tutorial about drawing animals helpful.
Step 1 – Gathering Drawing Material
Step 1 in this tutorial is to do a search for images and make a scrapbook. When learning how to draw a tiger, you will need to gather plenty of reference material. Be sure to collect a good varied selection of images to make the drawing process easy for yourself. A good library of images will help you draw the fine details and capture the tiger's spirit.
Step 2 – Begin With Simple Sketches
Start to draw the tiger as a rough simple sketch, rather than trying to draw all the details of the tiger from the beginning. Learning how to draw a tiger can seem intimidating, but don't panic. Take it step by step. You will need a good selection of paper, pencils and a good eraser, as well as good quality paper for the final drawings.
Step 3 – Learn How To Draw The Individual Parts
It will take patience to learn how to draw a tiger, but breaking your drawing down into easy parts will help you. As you learn how to draw the tiger you will see how each part fits together. Repeat each section until you are pleased.
It's important that you see and understand how each part of the tiger's body fits together to form the complete tiger. Draw each part and look at how everything fits together. Learn how the eye and ear fit on the head. Study how the nose and mouth stretch down to the neck and help form the overall shape of the head. Don't get upset by mistakes you might make, you can change them later.
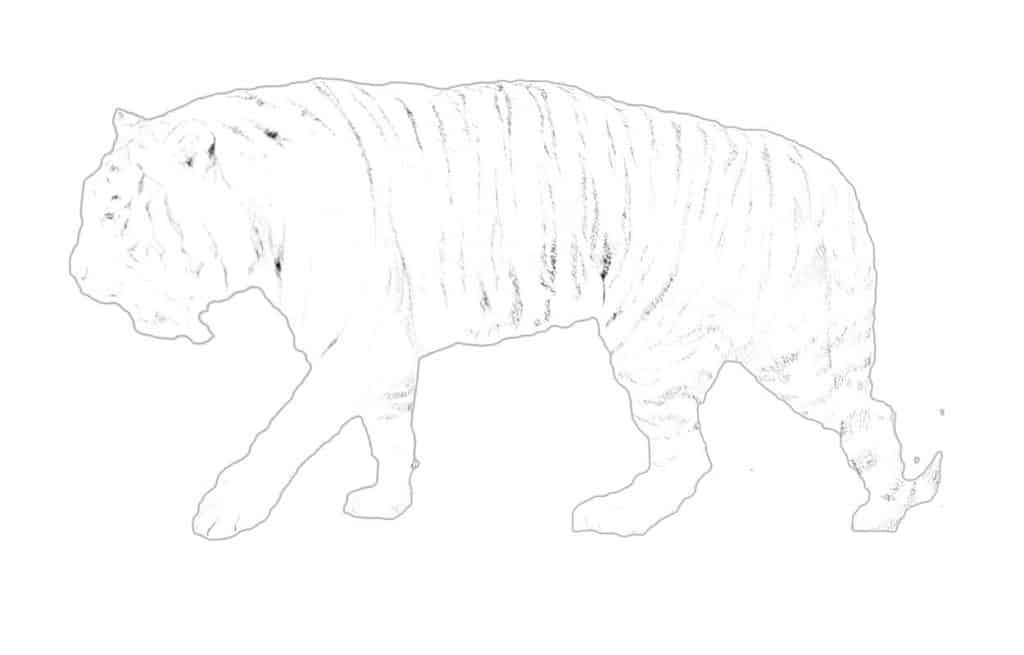
Step 4 – Draw The Tigers Position
In the next step, you need to study the line of the tiger's back and legs. Look at where each limb joins the body and how the skin folds. You can gradually fit each part together to form the final shape of the tiger. This will help you learn how to draw tigers in any position you want.
Understanding how a tiger moves will help you improve the final drawing too. Look in your scrapbook to see how the tiger sits, stands and runs to help you create realism in your own tiger drawing.
Draw what you see, not what you think it should look like. When you have drawn each section separately, you could cut each piece out, then arrange the shapes to form a complete drawing. This will help you get the tiger's stance correct.
The next step is to do some sketches of the tiger with the joints in the legs moved in different ways. Try to imagine the way that one section moving has on the next. This will help you understand the dynamic shape of the tiger.

Step 5 – Take A Step Back
Taking a step back can help you to see the details of the tigers head. Look at how the face, nose and mouth fit together as you draw them. Study the mouth and look at how the teeth and gum line form the bottom of the tiger's face. Take particular care with the shape of the neck. Study how the top of the head joins the tiger's back and how the folds of skin around the neck stretch down to the tiger's chest.
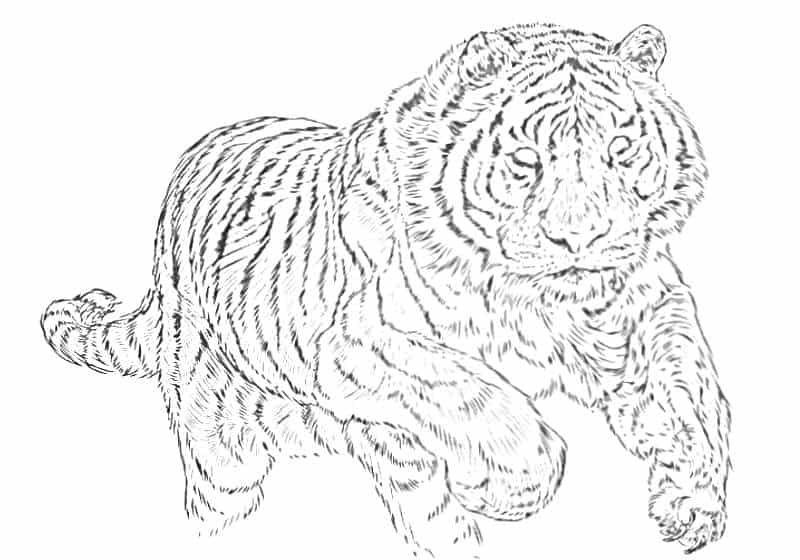
Step 6 – Look Beyond The Fur
Breaking the drawing down into simple, manageable steps will make the drawing start to come alive. Don't forget that many initial lines will be hidden when you draw in the fur. As you will be adding that later, don't worry too much if you need to correct certain areas or lines. This step enables you to create the basic shape of the tiger. When you are happy with that basic form, you can add more subtle lines that create the final shape of the tiger's body.
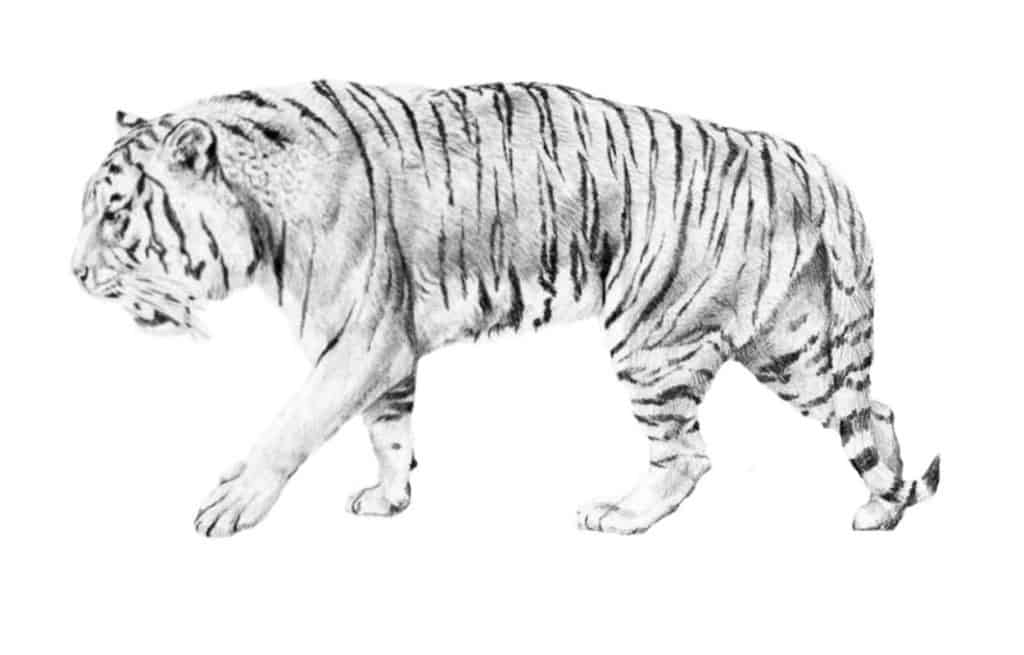
You should visualise how the shadows help create the shape of your tiger. Every muscle and tendon will create tension in the tiger's body, so try and capture that tension. Draw in the final shape of the head and legs. Study the lines of the tiger's back and shoulders, the way the tiger stands will help you capture emotion in your drawing. Draw the lines that join each area of the body. Study how the tail is held and where it actually joins the tiger's body. Try to look beyond the fur, see how the skin folds and stretches from one area to another.
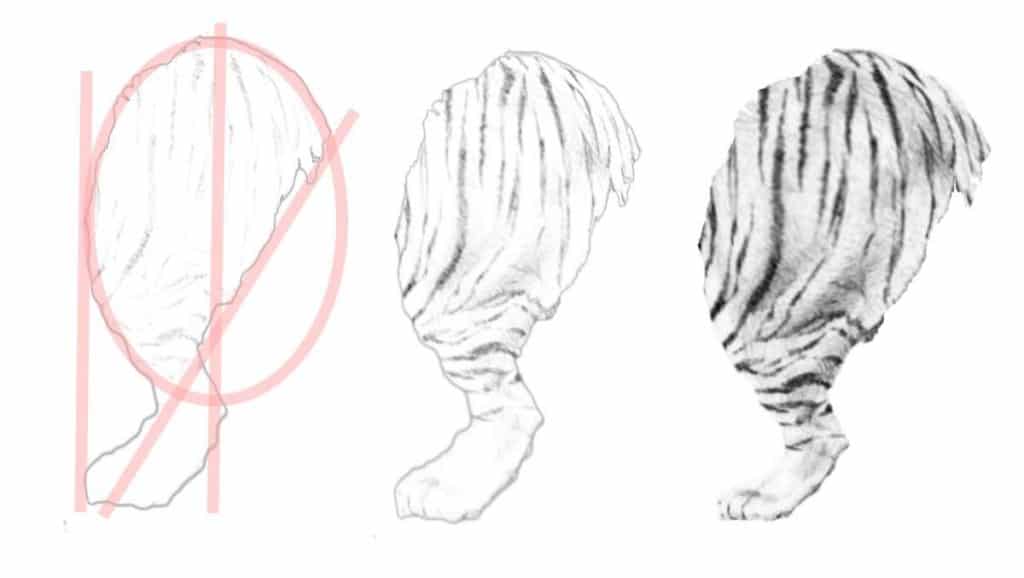
Step 7 – Create Depth And Shape
Take your time with this step because it can be tricky. As you begin to add the fur, work from light to dark. This will allow you to create both depth and shape. Graduate the shading in the drawing, so the whole picture doesn't end up too dark.
To begin, draw the shorter fur on the body. Look at the way the fur falls in different directions and how long each section of hair is. Step by step, work around the head, legs and body. Work on darkening the areas of deep shadow to a darker grey using cross-hatching or with a softer pencil. Draw the shape of the longer hairs around the head too.
Step 8 – Capture expression
The next step is to capture the facial features in your drawing .
The eyes give you the chance to build on the character you have created. A small change in the inclination of an eye can change the expression completely, so take your time.
Look closely and see how the line of the nose runs forward from the eye to form the front part of the tiger's face. Draw each section and step back to study your drawing. Draw in the shape of the ears, carefully judging their final position against the other facial features. This step of the tutorial helps you create emotion in your drawing and on the tiger's face.
Work from front to back and from the lighter areas to the darker ones.
Step 9 – Add detail
You can add the shading and fine details of the head and face.
Finish the eyes by drawing in any more details like eyelashes. Add the teeth, gums and any more fur that needs finishing. Always think about the direction of light and how that helps to create the contours of the face.
You can use any longer hairs to draw the viewers eyes into the picture. Emphasise the swirls and waves to create a more dynamic feel. You can even smudge some of the lines to create that feeling of movement.
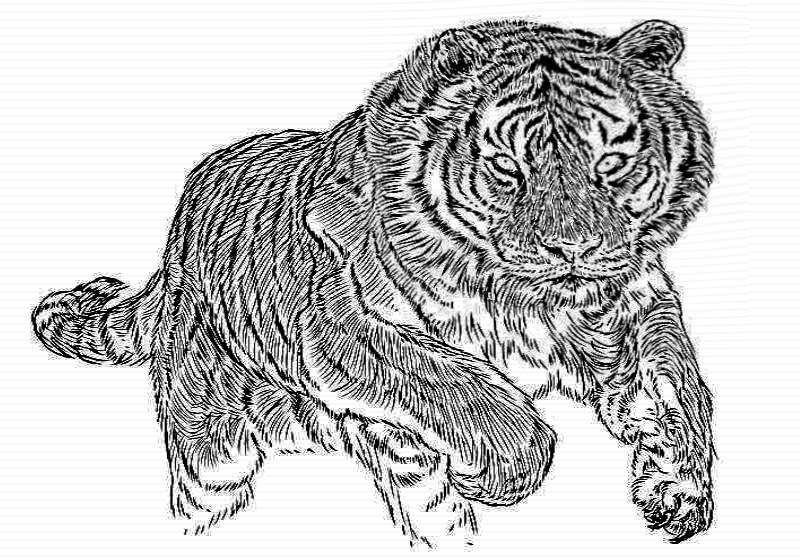
Step 10 – Final shading
Start to add the final shading now.
Cross-hatching can help to push the darkest areas back in your drawing. However, shading in a single direction can help you graduate from the darkened areas more easily. Use the right method for each different area. You can also use the shading to help you draw in the direction that the hair grows. Smudging your lines can work, too, especially to create movement.
Now you can add any other fine details with a sharp, hard pencil for a crisp line. Try to finish each section, like the face and nose, as you work around the drawing. Draw fine lines in a single direction for light shade areas so the shading can help draw attention to particular areas. This can emphasise what may be very physically small but important parts of the drawing, like where a muscle bulges or a tendon is stretched.
Using different pencil grades and varying the sizes of the pencil's tip can help you create any texture you need. You can use a rounded, worn down pencil tip for light shading and then add fine details on top to create an interesting effect. Sharpening your pencil to a chisel tip can give you a lot of flexibility, too, because you can use the broader flat face for shading larger areas while adding sharper detail with the side of the pencil tip. Both of these methods are really effective for fur. Different grades of pencil and line size will help you create both shape and depth in the tiger's fur.

Conclusion
Above all, always remember to enjoy your drawing. If you are finding a particular stage difficult, don't struggle; take a break. Walking away for a while can help. When you start again, you often find it easier. It is often better to step away than to continue struggling when you are finding something difficult. Nothing shows up more in a drawing than frustration.
mitchellnortrinter.blogspot.com
Source: https://brightercraft.com/2021/05/06/easy-tiger-drawing-step-by-step-tutorial/
0 Response to "Easy How to Draw a Tigers Habitat Tiger Habitt"
Post a Comment